
DIY Copper and Leather Hanging Clothing Rack


So, this DIY copper and leather hanging clothing rack has been on my mind for such a long time now and since I had all the materials, I decided that I needed to get on it STAT!
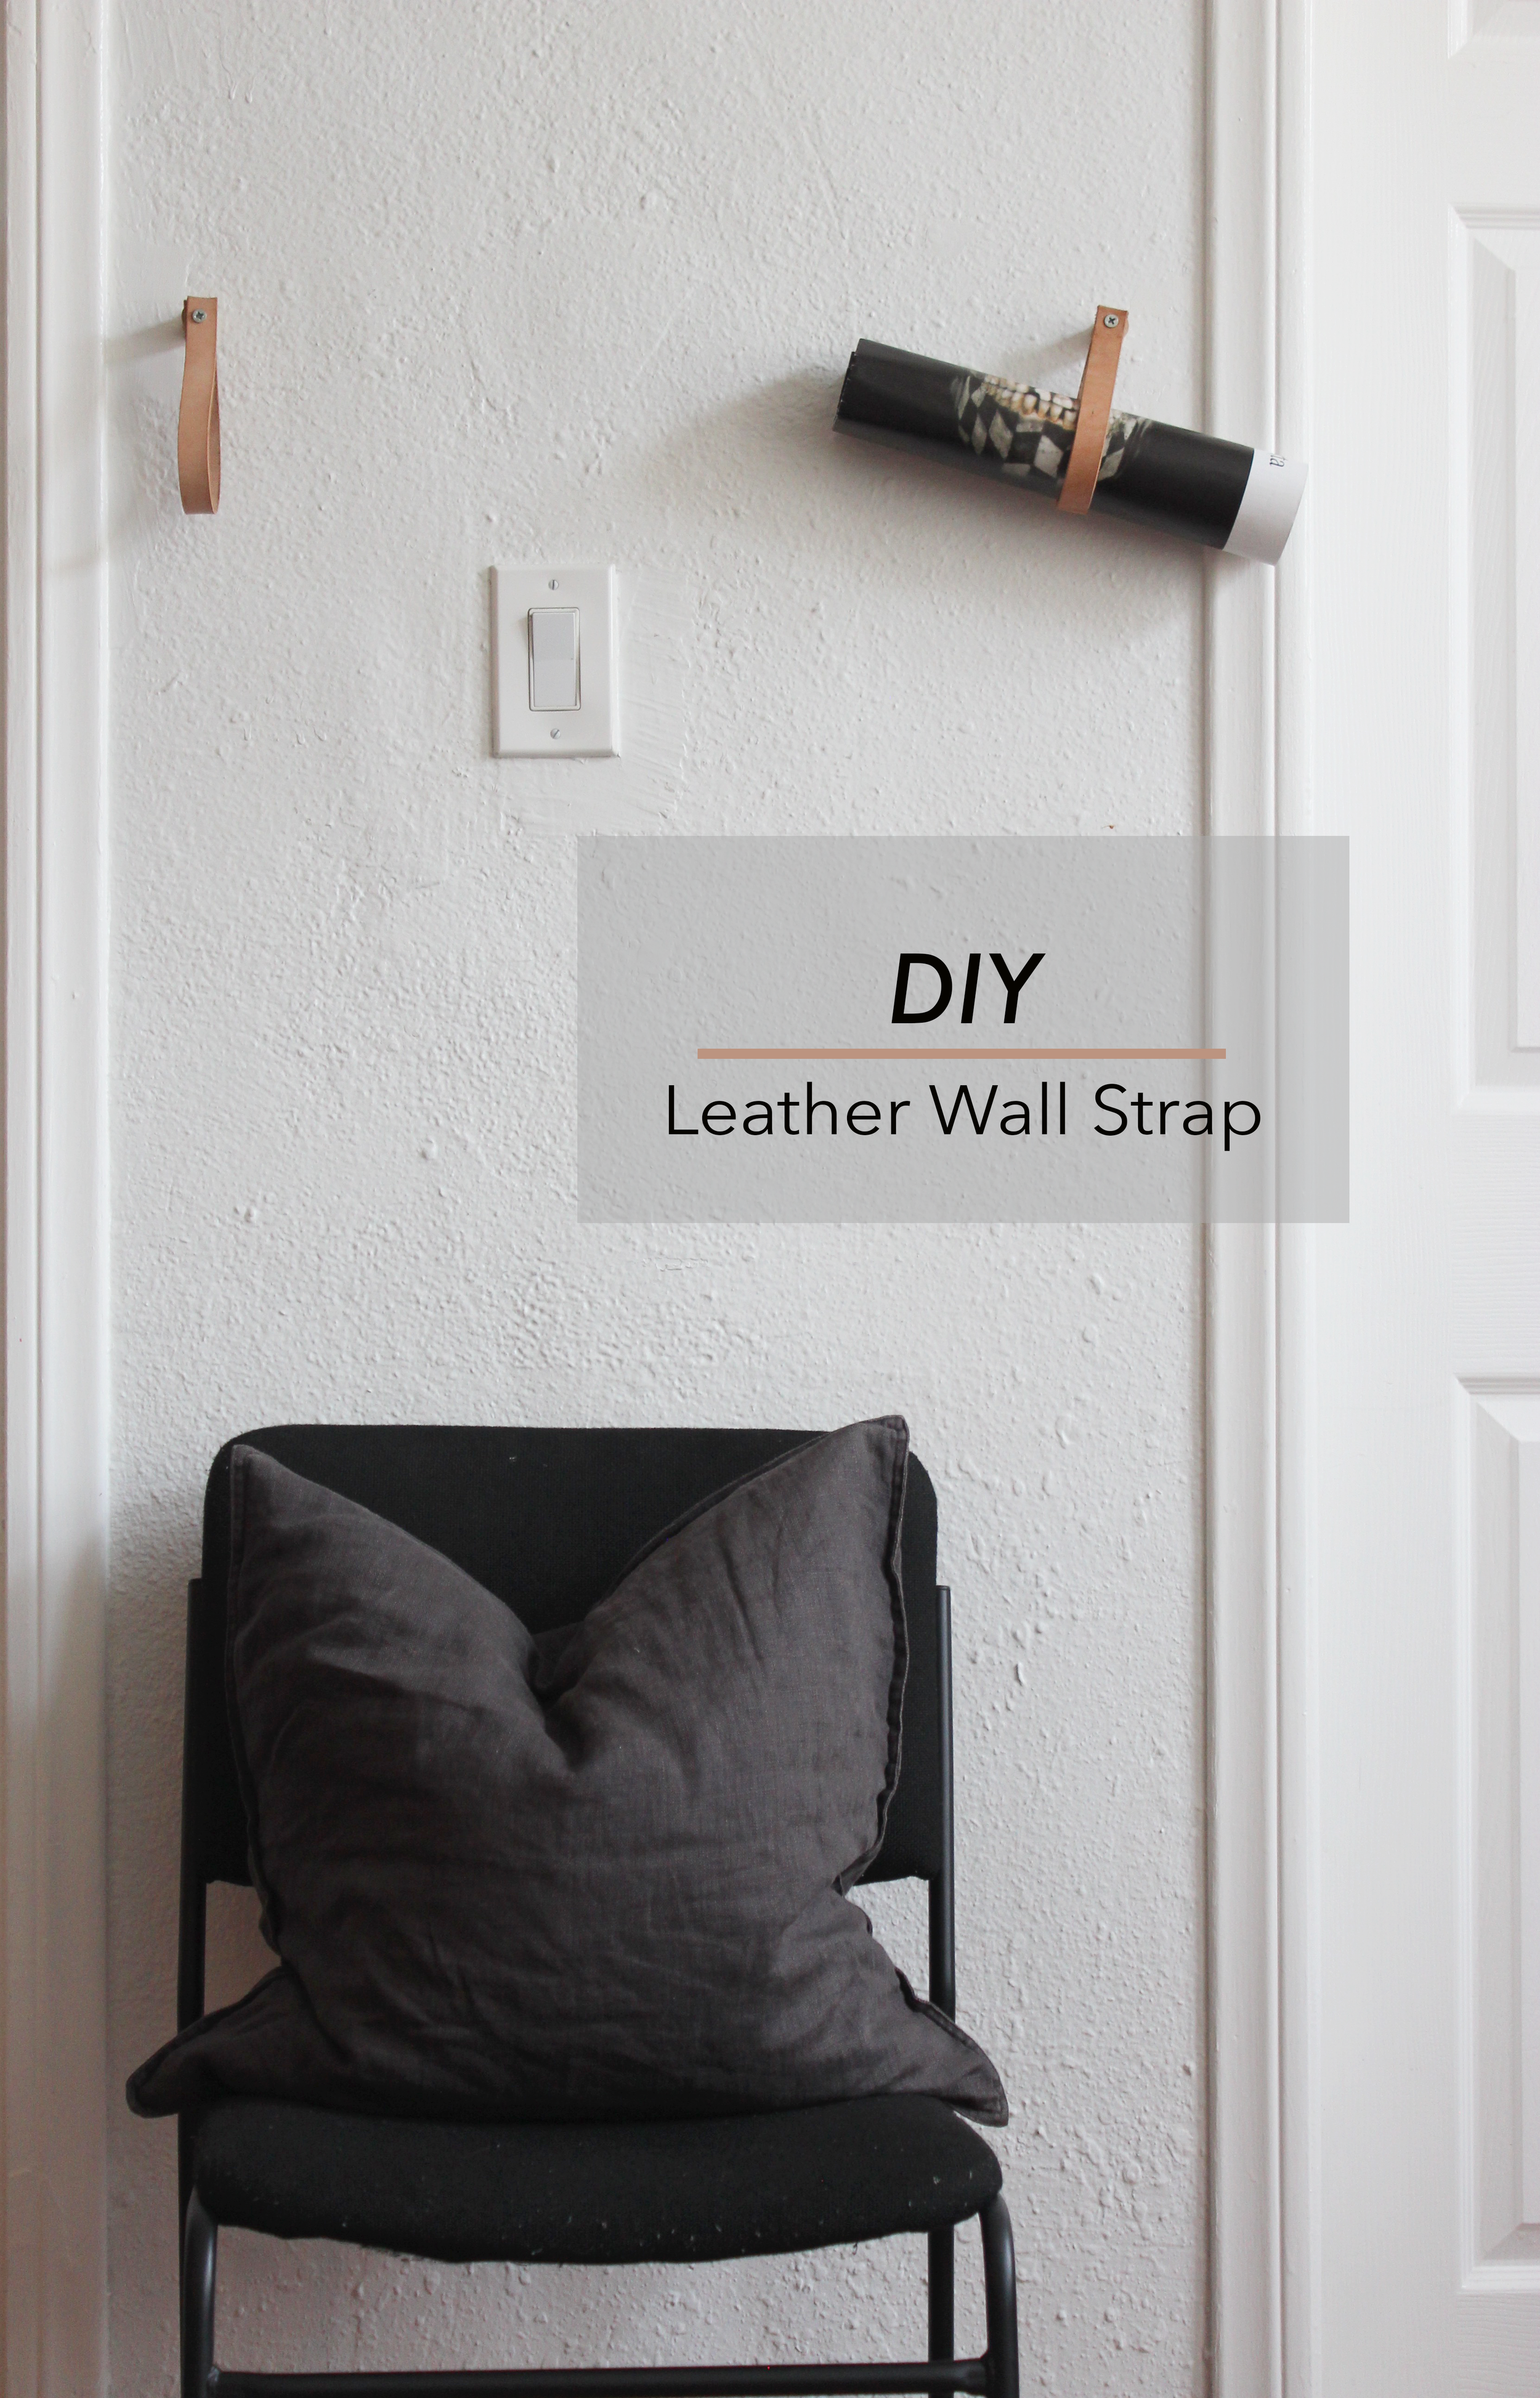
This hanging clothing rack / leather wall strap serves two purposes:
- temporarily hanging clothes (next day's outfit, youtube style videos)
- as a magazine/ newspaper holder (with the copper pipe taken out)
You see, in my tiny apartment every space and item needs to preferably serve two purposes. This wall usually houses a chair in the living area which can be dragged over to the table in the dining area. So when the hanging clothing rack is up, the chair goes to the table; when the hanging clothing rack is no longer needed, the pipe goes on my desk in a cool glass jar and I pop my latest magazine into one of the leather wall straps. I've perfected small space living!
Materials and Tools Needed
- Copper Pipe
- (2) Copper End Caps
- (2) Leather Straps (8-12 inches each)
- (2) Wooden Spools
- (2) Long Screws (at least 3.5 inches)
- Leather Hole Puncher (or a knife)
- Scissors
- Basic Tools (hammer, screwdriver, tape measurer)
- Pencil
- Nail (not necessary if you don't have one)


I made a video so you can see how to assemble this DIY hanging clothing strap / leather wall strap step-by-step.
Directions
- Cut two leather straps in a length of 8-12 inches each (mine are 12 inches each).
- Fold one strap in half and line up the top two edges (make sure they're straight and evenly cut).
- Measure and mark where you want your hole to go--I used my spool to get the perfect measurement, otherwise 0.5 inch - 1inch or so down will work. It really depends on your spool size. You do want your leather strap and spool width to be roughly the same size, so keep that in mind when buying.
- Grab your folded leather strap and punch a hole with your leather hole puncher where you've marked. Make sure that your hole is big enough to fit the screws!
- Repeat steps 2-4 for other strap.
- Take your screws and screw them into the folded straps about half way though (enough to fit the folded strap and wooden spool).
- Pre-drill holes on your wall. Make sure to measure several times before you drill. Also when measuring how high to place the hanging rail on your wall, keep in mind the length of the folded straps. So if you want your rail 60 inches from the floor, drill 60" plus whatever the length your folded straps are, from the floor.
- Screw your folded leather straps (with spool placed behind) into the wall.
- Next take your copper rail and attach the two end caps.
- Take the copper rail and slip it through the two hanging straps, and voila you have an awesome DIY hanging clothing rail!

Another Way to Use your Leather Wall Straps
Use it to display magazines or newspapers!


I'd be interested to see if you've attempted this DIY project. Is it something you'd try? Let me know in the comments below!
xx,
Cleshawn